Daz Studio Thumbnails

Sometimes the thumbnails that our content artists provide aren’t very helpful, or we’d like to have thumbnails for our own files, or maybe a folder named “Lilly’s Dress” isn’t enough to remind you what the dress looks like and you’re tired of opening the folder to find out it wasn’t what you’re looking for. This article is to provide some guidance on how I use thumbnails in Daz Studio to make finding content easier.

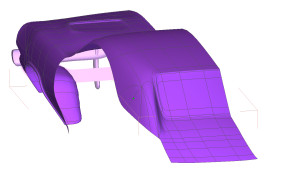
Minor Rant: There are some vendors who have taken to creating their thumbnails as “clay” renders without textures. This is really unhelpful when so many skirts and dresses are similar in shape. Without the textures it’s hard to tell some pieces apart. Even worse is when it’s not only a clay render, but a closeup of the neckline of a top or the waist of a skirt and I can’t even see the full product.

Thumbnail Sizes

Daz Studio has two thumbnail file standards. The first is the standard thumbnail that shows up in your Content Library and Smart Content panes. The second is an optional “tip” file which will be displayed (along with other information about the item) when you hover over a file in the content trees.

  • *.png – 91 x 91 pixels – This is the standard thumbnail that you’re used to seeing.
  • *.tip.png – 256 x 256 pixels (standard) – This is the image that is shown in the popup information when you hover over an item. If it doesn’t exist, Studio reuses the standard thumbnail. Also, technically, it can be larger than 256 pixels square. 256 x 256 is just the standard Daz enforces when content is being submitted.

Example

If I have a product called “Lilly’s Dress”, and I browse to the folder on my hard drive where that product is stored in my content library, I may find the following files:

  • Lilly’s Dress.duf
  • Lilly’s Dress.duf.png
  • Lilly’s Dress.duf.tip.png

Note that technically, the thumbnail files can also drop the “.duf” part of the file name and they will still work. This is an important point that we’ll come back to later. It’s only really required if you happen to have two or more files with the same root filename (e.g. “Lilly’s Dress.duf” and “Lilly’s Dress.dsa”) and you want to have different thumbnails for each file.

Tip: The fastest way to find the files on your hard drive may be to just right-click on the file in the content library view and choose “Browse to File Location”.

Creating Thumbnails

If you don’t like the thumbnails that exist, or Studio didn’t create a thumbnail (for example if you save a scene, it may not create a useful thumnail for the .duf file for that scene), it’s easy to create your own.

All I do is to setup a camera with my render settings to render a square (1:1) image at 256 pixels. Usually you don’t want this to be very artistic; so a bright scene that lets you clearly see what you’re rendering the thumbnail for works best. I will save this render as “<product/scene/whatever>.tip.png” (e.g. “Lilly’s Dress.tip.png”).

Then I will create a copy of the file and call that “Lilly’s Dress.png”. I edit that with my editor of choice (usually GIMP). I may choose to just resize it down to 91×91 or I may crop it first. I especially do that on my character presets that I save where the main thumbnail I may only want a head and shoulder shot, but the tip thumbnail is a full body shot.

Then I copy these PNG files into the folder where the product is stored. You may either need to overwrite the existing thumbnails or remove the “.duf.png”/”.duf.tip.png” files to get yours to show.

Saving Thumbnails

One thing that’s important, if you’re going to be overwriting the thumbnails the vendor provided is that you should save them somewhere! This is because if there’s ever an update to that product, there’s a high probability that the update will overwrite your customized thumbnails. I have a folder tree on my hard drive where I store customized thumbnails so I can go back and grab them after DIM updates my files.

Folder Thumbnails

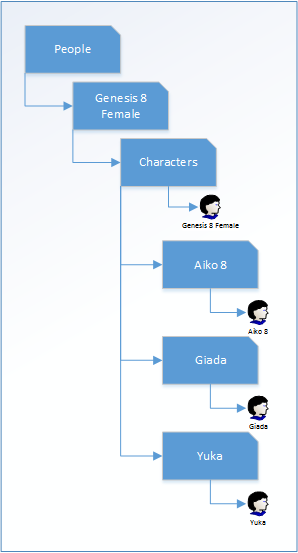
I’m not a big fan of using Smart Content. I have too many old things or stuff I have customized that I’m just not confident that Smart Content will find for me. So I tend to use the Content Library view a LOT when I’m browsing my stuff. One issue I have with that is that I’ll be looking at “My Content Library\People\Genesis 8 Female\Clothing\” and see a folder called “Lilly’s Dress”. But I may not remember what that dress looks like. Even worse can be when the name is something like “Sassafina” and I don’t even remember if it’s a dress or a pair of shoes!

This is where that point I mentioned above about the “.duf” not being important comes into play. We can create thumbnails for folders in our content libraries. The best part is that these ones won’t typically be lost either if there’s an update to the product. The exception to this rule would be if the folder is renamed or moved in the content library folder structure.

One thing I do periodically is to find folders where I just have the default Studio folder icon and replace it with a thumbnail that represents the product. Most often I will use a thumbnail that is either already part of the product or material settings, but sometimes I render them myself if those aren’t very helpful. Remember that if you do want to re-use an existing thumbnail, you may need to strip the “.duf” part of the filename as everything before the “.png” must be exactly like the folder name.

All you have to do is put the PNG file in the proper location and name it the same as the folder. So for the example I keep using, I would put a thumbnail file called “Lilly’s Dress.png” in the “D:\My Content Library\People\Genesis 8 Female\Clothing\” folder on my hard drive. Now when I browse to that part of my Content Library, I will see a picture of the dress instead of just a folder icon next to “Lilly’s Dress” in the Content Library tree.

Wrap-up

I hope this information is helpful to some of you. Please feel free to post a comment/question here or at DM me at JonnyRay over on the Daz Forums.

Daz Studio and Backgrounds

Another topic that comes up often in the Daz Forums is adding backgrounds to 3D images. While I wrote up a quick guide to my views on the ways to do this in the Question about skydomes and other types of backdrops thread, I thought I would expand a bit here to discuss what I see and the strengths and weaknesses of the various options. I link to a few images where I have used these techniques

HDRI images

HDRI Images are easy to use in Iray rendering (and not terribly difficult anymore in 3Delight) and probably the most common way right now to add a sky or background to your image. They have a few advantages in that they completely surround your scene, provide lighting which automatically matches your background (no more shadows going left in the background when the lighting on your figure casts a shadow to the right), and often include a ground texture for a full environment. The drawback is that the quality of the HDRI will drastically affect your experience with them and you are somewhat limited in how you place your figures and props within them since you can’t move the dome. Also they have to specifically be designed to support Depth of Focus (DOF) from your camera; so most of them will be sharp and in focus despite looking like the background is far away from your figure.

If you’re going to use HDRIs from a source like HDRI Haven you will do yourself a favor to get used to the options for either Infinite or Finite sized HDRI domes. Also tools like the IBL Master and Iray HDRI Toolkit will help you use HDRIs more easily and get more value from them.

Images like Neko’s Lazy Sunday and Jogging in the Park are only using HDRI images for the backgrounds.

Backdrop

If you want to use the Backdrop feature (Environment Tab (not to be confused with the Environment tab in Render settings) – select an image for the background instead of a color), you can do it, you just need to edit the image you’re going to use to be the size of your render. That will avoid any distortion of the image when Studio tries to make it fit the background.

I used that technique for my Neko in Venice image. The main advantage to the backdrop over the flat primitive is that it is technically “outside” your scene; so you don’t have to worry about it blocking lights. It also “follows” your camera so you can change camera angles to frame it the way you’d like without having to move the plane behind it.

The drawback is that if you change your mind about how you want to frame the image and it affects the cropping or aspect ratio of the background, you’ll have to re-edit the background image to map to the new dimensions.

Flat Primitive with an Image

For flat backdrops, when you have a specific camera angle already setup, using a primitive plane and putting the image on there is the most flexible. You can size the plane so that the image has the proper proportions and move it around to use only the portion of the background that you want in your render.

The drawback is that you have to pay attention that it isn’t getting in the way of any lights or props you have in your scene. Also, if you move your camera, you may need to re-position the plane to align with the new camera angle.

Curved Primitive with an Image

Several environment sets for sale use these. The advantage over the flat primitive is that the background curves around your set so you aren’t limited to only shooting in one direction. This is particularly useful when you’re shooting an indoor scene and want to have something outside the windows but don’t want to be limited in your camera angles.

While it is more flexible to camera angle adjustments than the flat plane is, you could still run into cases where moving your camera means you need to move the backdrop as well.

Skydomes

By this I mean the “old” way we used to do this which was to create a large half-sphere which covers your entire scene and has an image mapped on the inside. Advantages here are that I get the flexible camera angles like the curved primative, I can move and re-size the dome to adjust to my scene unlike HDRIs, and I get the full sky and surrounding environment. Drawbacks however are that I won’t get a ground like with most HDRIs.

Also, these can cause issues when you’re rendering with Iray. For instance, if you set your Render Settings / Environment to use Sun-Sky or load an HDRI sky image thinking it will provide daylight, technically Iray will think there’s a solid dome covering everything; so the light you’re expecting to come from the Iray environment settings will be blocked by your skydome.

This is one of the more common reasons we see people coming to the forums and asking why their lighting isn’t working on an older environment set.

Cylcloramas

For example, the “Millenium Environment” that comes with Studio. These are really falling out of favor. They have an advantage of providing true depth where some elements are closer to the camera than others. And they are lightweight environments on your computer because all of the background items are pre-rendered flat props instead of full 3D geometry, but you have to be REALLY careful about lighting and camera angles or the illusion is spoiled; so they aren’t very flexible.

No Backdrop

Finally, I’d be remiss if I didn’t also mention that many people will choose to render without a backdrop at all and composite their render over a 2D image using something like GIMP or Photoshop. Since those 2D image editors provide other tools as well for postwork, this can be a great option and is a technique I used for my Walking a New Path image in the gallery. If you’re doing this, you’ll probably want to learn a little about Iray Shadow Catchers because casting realistic shadows on the backdrop is the trickiest part to this technique.

Summary

There isn’t necessarily any “right” or “wrong” to any of these options. They are choices that you make as the artist to what fits best with the image you’re trying to create. I’ve given what I see as the strengths and weaknesses, but you will have to experiment a little and choose for yourself.

My Daz Studio Workflow

I’ve typed this post multiple times on the official Daz 3D Forums; so I thought I’d write it up here so I can just refer to it instead. Maybe this will help some people or at least give you some ideas about how to create your own workflow that works better for you.

My Scene Creation Workflow

As for my overall workflow, I tend to build scenes using this process. Sometimes I short cut it if I’m doing a quick scene “just for fun”, but anytime I want a quality result, I use this process.

  1. Scene Blocking
    1. First I’ll figure out the setting (environment) and rough camera angle I want to use. I make sure to use an actual camera and not just the perspective view or so I don’t lose the blocking of the image.
    2. I may also rough in the lighting at this time like adding HDRI skies and other lights I think I’ll need.
    3. I save this as a scene, and start a new one.
  2. Character Setup
    1. I load one of the gray background HDRI presets from Colm Jackson‘s PRO-Studio HDR Lighting package. I like the even, low-contrast lighting for character setup.
    2. I load my first character I’m going to use, tweak skin, eyes, add hair and clothes.
    3. A recent addition to my workflow is to add Canary’s Cameras as they provide a quick way to look at my character setup from multiple angles. Saves me a lot of time.
    4. I will do several test renders to make sure things look okay rendered.
    5. If the character is going to pose by themselves in the scene, I may choose a pose for them at this stage. If they will be part of a “couples” pose, then I leave them in default.
    6. I save this as a “Scene Subset” rather than a “Scene” because the Subset won’t include the HDRI I loaded for the setup or any cameras I created for test renders. (Refer to the note about Scene Assets below for an alternative for frequently used characters.)
    7. I repeat the above for each character in the scene.
  3. Optional – Couples Posing
    1. If the characters are going to be posed using a couples pose, I’ll create a new “character setup” scene with my standard HDRI
    2. Then I import the Scene Subsets for each character and apply the couples pose to them.
    3. I will adjust the poses if necessary, doing some quick renders to make sure that the intersection of characters, clothing, etc. looks correct. V3Digitimes‘ Ultimate Pose Master has made this process SO much easier and quicker for me!
    4. Then I create a group with the two characters and save this as a new Scene Subset, excluding any cameras and lights I added.
  4. Character Placement
    1. Now I’ll reload the original scene and merge the character and/or couple scene subsets into the main scene and move the characters into their positions in the scene
    2. This is where the couples group comes in handy because I can move them together without having to adjust each one individually
    3. Now I’m tweaking poses, adding or removing other props, etc. to get the final look for the image I want.
    4. During this time, I use the Aux viewport set to my main camera view while I’m using the Perspective View to move pieces, adjust poses, etc. That way I can see how the changes look from the main view.
    5. I also swap from Perspective to Main Camera on my full viewport to make sure I’m getting the results that I’m trying to and that I’m not spending too much time on something that won’t even show in the final render. I can’t tell you how much time I wasted trying to get a hand to be in the correct place only to realize it was blocked from the camera anyway and nobody would notice all the time I spent getting the fingers to just lightly touch the other character’s waist.
  5. Lighting
    1. Once everyone is in place, I start tweaking my final lighting, doing test renders and adding Ghost Lights, etc. to get it looking correct
    2. With some renders, this is the longest part of my process as I feel the lighting has the greatest impact on the overall quality of my images
  6. Final Render
    1. I always do my final renders using Iray canvases, even if I only intend to use the Beauty pass. Canvases contain richer information about the image and so are a better basis for any post processing I want to do.
    2. For higher quality images, I’ll also create canvases for each light source so that I can adjust their strength in the postwork
    3. I also always render about 20-50% larger than I want the final image to be. That allows me to downsample the image post-render which can help reduce any remaining “noise” in the image.
    4. If my goal is the highest quality I can produce, I’ll disable Iray Tone Mapping and set the render quality settings to 100% convergence, Quality factor of 8, and both max samples and max time constraints to max values to allow the render to go as long as necessary.
  7. Postwork
    1. I use GIMP to import the EXR files from the Iray canvases and perform exposure adjustments, layering the light layers, etc. I save this as a GIMP file so I can come back to it if necessary.
    2. I will export the image as a PNG in it’s full size, then open the exported file and resize it. This way I don’t mess up the post process file I saved in the previous step.
    3. Even though I calibrate my monitors regularly, I’ve found that mobile devices display them much differently; so I’ll open the final file on my mobile phone and use Adobe Lightroom to perform final tweaks to the exposure and color balance settings before I post it anywhere.

An Aside about Support Assets

For frequently used characters, consider using the “Save As -> Support Asset -> Scene Asset”. This has a value over saving a scene or scene subset in that updates to the components of the scene are reflected in scenes that use them. To put it more clearly, if you have a character you use often that is setup using Aiko 8 with OOT’s Linda Ponytail hair. You get her basic setup and save her as a Scene Asset (let’s call her Aikolinda). Then you load Aikolinda into one (or more) scenes you’re going to render. Then you decide you don’t like her as a blonde and want her to be a redhead. If you go back and update Aikolinda with the new hair color, that change will automatically be reflected in every scene you loaded her into. If you had saved her as a Scene or Scene Subset, you’d have to apply the hair color change manually to every scene you used her in.


Update on The Beast

It’s been a few days now since my last update on Project: The Beast (WIP) so I thought I’d share a little more about this journey. I’m currently on restart #3 of the project. As I’ve watched some additional tutorials on modeling cars, I would realize that a decision I made early was going to make the process a lot more difficult.

Useful Learning

Although the tutorial I’m going to link below uses Blender for the modeling tool of choice, what I really like about it is how Kevin explains WHY he does things certain ways rather than just saying “Do this, then do that…”

Modeling a 3D Car by TestedPancake

Progress report

While I’ve made a few updates on the mesh for the body, I’ve spend a lot of time lately working on other pieces and parts. I was going a big crosseyed trying to find vertices to tweak on the body and needed a break.

Beast Wheel

Mag wheel created for my 1968 Charger modeling project.

Beast Lugnut

Lugnut created for my 1968 Dodge Charger project.

I’ve shared both of those on ShareCG as well for others to download and use however they’d like.

Then I created a custom logo badge for the front grill. Normally it would say “Charger” there, but I’ve changed that to say “Beast”.

Beast Badge

Custom badge for the front grill of my 1968 Charger project

It even looks pretty good on the grill itself…

Beast Grill

Grill, with custom badging, for my 1968 Dodge Charger project

Project: The Beast (WIP)

This post will be updated with my work in progress snapshots from a new modeling project I’m working on. My girlfriend’s favorite car is the 1968 Dodge Charger. If you look around for existing 3D models, it’s easy enough to find a 1969 Charger. But the 1968 had a few differences mostly on the front and back ends. While I can find a 1968 model on Turbosquid, $125 is more than I am willing to pay for a single piece of hobby content.

I’ve watched a few tutorials on modeling a car in Hexagon and I think the one that has the method that works best for my mind is Master Hexagon – Car Modeling Basics available from Daz 3D.

I did however borrow setting up the reference panes from an older tutorial on YouTube Modeling a Car, Part One, Hexagon.

I’m not going to write a lot about how I’m doing this. I didn’t intend for this to be a tutorial. Merely a place to capture the work as it progresses.

BTW, in full disclosure what you’re seeing is my 3rd start on this project. I trashed the first two as the mesh was getting too difficult to tweak and smooth out. This approach has worked much better.

Pre-Modeling – Reference Panes

TheBeast300-ReferencePanes

Reference planes about to to be used for shaping the 1968 Dodge Charger model

Part One – Front wheel well

TheBeast321-Front Wheel Well

The first part of the Charger that I modeled. Basically the whole car “grew” from a single quad face over the top of wheel well.

Part Two – Front bumper

While I did model a bit of the front of the car, I jumped to the bumper because I made it a separate part of the object.

TheBeast337-FrontBumper

Half of the front bumper, including a small push bar and an integrated driving light.

Part Three – Hood and full fender

I finished out the front of the car before starting to move backward from here.

TheBeast345-Hood

Half of the front-end of the car body plus the bumper that I finished in the last step.

Part Four – Roof and Windshield

I kept following back from the hood to flow up over the windshield and across the roof.

TheBeast362-WindshieldandRoof

Showing the body from the front, extending the hood up and over the roofline.

Part Four A – Rear Window and Trunk

TheBeast362-RearDeck

The rear roofline, back window, and the surface of the trunk.

Creating a Holey Cube

In Daz 3D’s Hexagon forums, one of our newer modelers asked about how to create a cube with intersecting holes from two sides. In his Penetrating a Rhomboid post, I suggested using the bridge function, which got halfway there, but I realized after he tried it that I could have been more complete in my description. So, this is how I did it.

Step 1 – Create the cube

I created a cube primitive with 8 tesselations to give me a nice center set of faces to work with on each side.

Holey Cube 01

The cube we’re going to pierce.

Step 2 – Make holes

I removed the 9 middle faces on each side, leaving the top and bottom solid.

Holey Cube 002

The center faces removed

Step 3 – Bridge two holes

I selected the edges around two opposing faces (click on one edge of each hole and use the Loop selection to select the hole). Then in Vertex Modeling, I chose Bridge and accepted the results.

Holey Cube 03

The first two holes bridged

Step 4 – Bridge the other holes

Then I repeated the process to bridge the other two holes. This creates the structure, but as you can see, the holes don’t go all the way through. Each bridge is blocking the view through the other.

Holey Cube 04

Both holes bridged

Step 5 – Tesselate the intersection

I hid the top of the cube (created a material zone with the top faces and hid that zone) so you can see inside the cube. I used Tesselate by Slice to slice each bridge as close to the other bridge as I could.

Holey Cube 05

Bridge overlaps tesselated

Step 6 – Remove the intersecting faces

Back inside the holes, I selected the new faces that were blocking my view through each hole and removed them.

Holey Cube 06

Intersections removed

Now you can see through, but if you look closely inside the hole there is a slight cap between the edges of each hole.

Step 7 – Weld the edges together

I admit to forgetting about the tools Hexagon offers at first. I started by manually going through and welding the vertices in each edge together. That was painful. Then I remembered the Average Weld function. It’s perfect for this as Hexagon is smart enough to figure out that those vertices are close enough to be welded. That went a LOT faster! Like a single click and it was done. 🙂

Holey Cube 07

Intersection edges welded

Step 8 – Test smoothing

Just to show I wasn’t quite done yet, I set smoothing level to 2. See that mess in the middle? That’s because there are still some faces from each hole that are overlapping there messing up the smoothing algorithm.

Holey Cube 08

Bad smoothing due to overlapping holes

Step 9 – Remove the overlapping faces

I removed the faces from one of the two holes, leaving the faces from the other one in place.

Holey Cube 09

Overlapping faces removed

Step 10 – Tesselate and weld

Once again I took the remaining faces and used Tesselate by Slice to create corresponding edges, making a grid in the center. Then I used Average Weld again to weld it all together.

Holey Cube 10

Intersection tesselated and welded

Final Product

Finally, with Smoothing turned to 1 you can see all my gaps and such are gone. I could adjust the edges of the holes a bit to make them more round instead of square, add some edges around the outline of the cube to keep it from smoothing too much, but that’s just tweaking it for the effect you’re going for really.

Holey Cube 11

Smoothed

Linking to Converted Clothing

This is a tip for people who may be using RiverSoftArt’s wonderful Clothing Converter from Genesis 3 Female to Genesis 8 Female for Daz Studio.

If you’re like me and…

  1. Don’t use Smart Content, but rather browse the Content Library
  2. You followed River’s suggestion and placed your converted clothing somewhere other than your main content library
  3. You’re running Windows 7 or later

…I might have a tip for you to make your converted content easier to find.

    1. Find the full path to your converted clothing. (e.g. c:\users\jonnyray\documents\DAZ 3D\Studio 4\My Library\People\Genesis 8 Female\Clothing)
    2. Open a command prompt as an administrator
      1. Start -> Run -> cmd.exe
      2. right click and say Run as Administrator
      3. click OK on any security warnings)
    3. Change your command prompt location to the location of your main clothing folder for Genesis 8 Female.
      cd “c:\users\public\documents\DAZ 3D\Studio\My DAZ Library\People\Genesis 8 Female\Clothing”
    4. Create a symbolic link to the converted clothing path you found in step 1…
      mklink /D “Converted from G3F” “c:\users\jonnyray\documents\DAZ 3D\Studio 4\My Library\People\Genesis 8 Female\Clothing”


What this will do is create a “folder” in your Genesis 8 Female\Clothing folder called “Converted from G3F” that will point to the location where the converter is putting your clothes. It won’t show the metadata tags like “Wardrobe” and such, but everything will load just like it loads from the actual location and you don’t have to browse two different content library structures to find your converted clothing.

3D Modeling Observations

As I’ve gotten back into modeling some of my own 3D content, I realized how it has given me more freedom of expression. A lot of my renders lately are of the roleplaying characters for my girlfriend and I to create snapshots of stories we’re co-writing. We tend to have very specific ideas about the look of our characters and the things they might own; so being able to create simple things myself has allowed me to reach my goals for my images without having to be limited by the content that others have created.

For example, our characters recently got married in-game. So we wanted the images I created to have wedding bands. But she’s particular about wanting to have silver/platinum and simple, but not entirely plain. While there are a lot of ring collections available from marketplace sites like Daz 3D or Renderosity and even freebies from places like ShareCG, nothing was quite what we needed and I didn’t feel like spending $10-12 for a collection of rings that were “close” when I could create some myself.

It took me a full evening to create the rings we wanted, but most of that was actually about getting them to work properly as props attached to the character’s hand rather than the modeling itself.

Moncreiffe Wedding Rings

Wedding rings worn by Conall and Simi

Another example was a simple picture frame that I needed. The story is that they are fans of Tim Burton’s “Nightmare Before Christmas” and so we needed a picture to hang on the wall with a frame that was appropriately just a little unusual. It took me less than 20 minutes to come up with this as opposed to buying a collection of frames or spending an hour searching for a free one.

Framed Nightmare Before Christmas

Picture from Nightmare before Christmas framed and hanging on the wall.

As a final example, the crib below is based off a design that Jenny really wanted to use for the baby. This project took longer because of a couple of false starts on my part. I could go into my mistakes and rework at length, but in the end it was mostly about knowing when to do the UV mapping of the parts of the crib. It also represents the first time I created something specifically to use Daz Studio’s dForce cloth simulation (the canopy is modeled from a basic cone shape and the dForce simulation makes it drape properly).

Siofra's Crib

Baby crib with a lace canopy.

My point to all of this is that none of these objects existed exactly in any 3D market or freebie sharing site anywhere. Learning how to model them myself allowed me to create exactly the items I needed for my image instead of just browsing through my collection of 1000s of pre-made items to find something that is “close enough”. Not having to compromise (and yes, being a bit proud of rendering with something I created myself) is a good feeling as an artist.

I encourage anyone who wants to take their artistry from composing the objects created by other people into a realm where you’re creating images that conform exactly to your vision to learn at least the basics of modeling. You may not ever want to get to the point where you’re creating your own clothing or modeling an entire forest. But the freedom you gain from knowing you can create your own lamps, picture frames, dishes, even furniture is a wonderful new experience!

Daz Studio 4.10 Iray Viewports

Note: A lot of this information is taken right out of Daz 3D’s Getting Started in Iray tutorial video on YouTube. If you learn better from videos, you might find that helpful.

The Problem

I’ve seen repeated questions about improving performance of the Iray drawing style in Daz Studio 4.10 viewports. Imagine my surprise when I was watching the Getting Started in Iray tutorial video and found a wealth of information already available on the topic!

Photo realistic rendering in the Daz Studio viewports can slow down even some of the fastest computers out there because Studio is trying to interactively create a “final” image and has to recalculate light paths, material interactions, shadows, and such each time you move your view or relocate content. This can cause people to feel like the program is really sluggish and/or that it causes everything else on the computer to grind to a halt every few seconds.

Interactive to the rescue!

Technically, NVIDIA Iray has two modes that it can render in. The one that is the default and we’re most familiar with is Photoreal. With only a few exceptions, this will be the mode you want to use for final image rendering.

There’s another mode called “Interactive” which has many of the same features as Photoreal. However, because it lacks support for computationally expensive features like subsurface scattering and caustics, it will generally render much faster.

Rendering Devices

On the Advanced tab of your Render Settings, you have the option to select which devices (CPU or graphics cards) can be used to perform Iray renders. There are separate selections for Photoreal verses Interactive. Personally, I don’t mind if Studio has to fail over to my CPU for a large final render, but for Interactive mode that we’re using on viewports, it’s probably better to uncheck the CPU. This will also stop the Iray engine from grabbing the CPU for rendering purposes and slowing everything else down on your computer.

Render Device Settings

NVIDIA Iray Rendering Devices in Daz Studio 4.10

Render Settings

While we’re on the Render Settings, go back to the Editor tab, Render Mode and change this to Interactive. Technically you might think this would ONLY affect if you’re doing a final render. However the Daz Tutorial indicates that Rendering Style and Draw Style are linked in some way; so it’s best to set this setting to Interactive as well.

Iray Rendering Mode

Choosing between Photoreal and Interactive modes

Just don’t forget to switch it BACK before you do your final rendering!

Draw Settings

Next is setting the drawing style for your viewports. There’s a good chance you don’t have the Draw Setting tab open in Studio. Go to your Window menu -> Tabs and select Draw Settings. You can dock it wherever it feels most natural to you.

Also, you will need to repeat the steps below for each viewport that you’re using Iray in. Most of the time, I will set my Auxillary (Aux) Viewport to Iray so I always have a rendered looking image to refer to even if I’m using Texture Shaded on my main viewport. Draw Settings changes focus for each active viewport that you click on; so make this changes in any viewport using Iray.

Draw Mode

Go to your Draw Settings tab, Drawing section and change the Draw Mode from Photoreal to Interactive.

Draw Mode Settings

Setting the drawing style on the current viewport

Response Threshold

When you’re using Interactive Draw Mode, Studio will pixelate your image when you start moving your view around and then will resolve it back to a rendered image when you stop. Response Threshold tells Studio how sensitive to be to view changes before it changes to the pixelated view. The lower the number, the more quickly it decides to pixelate the image. Higher numbers make the Interactive rendering engine work a little harder, but if your graphics card can handle it, it’s probably less annoying for you. You may need to play with that value to find a number that works for you.

Manipulation Mode (optional)

If you find the pixelated image still feels too sluggish when you’re navigating around your scene, you can choose how the content display changes when the Response Threshold is exceeded. As I mentioned, by default it pixelates the image, but from the Draw Mode tab, General, Manipulation section, you can choose to use either wireframe or solid bounding boxes instead. This is another option for those who are using slower computers or if you have a very large scene with a lot of detailed content.

Manipulation Drawing Style

Choosing how Daz Studio draws content while moving the view

Conclusion

I hope this information is helpful to someone. The Tutorial video covers a few other pointers on using Iray as part of the scene setup process. I highly recommend it to anyone getting started in using this tool.

DS Content Management (Characters)

I’ve seen some posts lately in the Daz 3D – New Users forum about people wondering about how to organize their content. While things like Smart Content and Content Categories have made this a lot easier than it used to be, I still find myself typically browsing the content folders.

So, to make things easier on myself, there are some standard things that I do to make content easier to find. In this entry, I’ll talk about how I move / copy / rename folders for my main characters.

Caveats

  1. The method I’m about to talk about does have a drawback. When there is an update to something that was moved, you will need to go and repeat the move / copy of files and folders. I’ll cover that more at the end, but if you don’t want to have to remember to update your folders and files after a product is updated, this may not be the method for you.
  2. This represents how MY mind thinks about content and what’s important. while it might work for you too, I’m sure there are other ways to accomplish similar goals

My Problem

I have three issues when I’m looking for a character to use. First is that when I’m looking for characters, the names of the folders aren’t always sufficient. 6 months after I bought it, remembering that Giada is a young teen looking girl based on Aiko 8 is almost impossible for me.

Second, even if I do remember the character’s name I’m looking for, the number of clicks to get there is annoying. I’d rather have my base characters available at a higher level in the structure.

Finally, I find it annoying to have all those folders with the default folder icon. Wouldn’t it be better to have the character’s headshot instead of a folder?

DAZ Default Character Folders

By default, DAZ wants to organize your character folders like this:

DAZ Studio Character Organization

The default organization of how folders and files are saved for character content in DAZ Studio

So, to load Aiko 8, I’d have to click on People, Genesis 8 Female, Characters, Aiko 8, and then I find the Actor file to load her. Also, unless I magically remember that Giada and Yuka are two Aiko 8 variants, I might have to click on each one, see their icon and then my memory is jogged.

My Character Folders

I will describe the actions I take on my character folders below, but here’s a diagram of the changes I make.

My Character Organization

How I copy and rename character folders and files

My Approach

Several key steps here in what I’m doing with this organization.

  1. All of the main characters start with an exclamation point (!). Since Daz Studio sorts things alphabetically for you in the content folder view, this will force all of the main characters to the top of the list.
  2. I copy of all the actor files (and their thumbnail png files) to the Characters folder. This does two things for me.
    1. First, it means I can see all of my Genesis 8 Female characters in a single folder
    2. Second, since the Actor file and the folder name are the same, it changes the icon on the content browser from the default folder to the character’s Actor thumbnail.
  3. If the character is another layer down (say for example with Giada, the folder path might have been People> GF8 > Characters > FWSA > Giada), then I move the whole folder up one level. While I appreciate the effort that Fred Winkler and Sabby put into their character, the “FWSA” folder is just an unnecessary click to get to what I really want.
  4. For characters that are derived from one of the base character shapes, I add a prefix to the folder, actor, and thumbnail filename. For example, since Giada’s Product Page says that she requires Aiko 8, I add “A8” to the folder and file names. This helps me group my characters into basic families of similar body shapes. Also, in order for the thumbnail trick to work, both the actor thumbnail file and the folder have to be exactly the same. Other prefixes I’ve used include:
    • Genesis 8 Female = G8F
    • Victoria 8 = V8
    • Olympia 8 = O8
    • Charlotte 8= C8
    • The Girl 8 = TG8
    • … you get the idea.

More to Come

As I said, this is a method that works for me. If it at least gives you some ideas on how to help you get your hands around the 3D Content that you own, then I’m glad I helped. Feel free to post questions here or, if you’re on the Daz 3D forums, drop me a PM at JonnyRay.

I will keep adding other categories of content to this series. Check my Content Management category for other similar posts.

« Older entries