In Daz 3D’s Hexagon forums, one of our newer modelers asked about how to create a cube with intersecting holes from two sides. In his Penetrating a Rhomboid post, I suggested using the bridge function, which got halfway there, but I realized after he tried it that I could have been more complete in my description. So, this is how I did it.
Step 1 – Create the cube
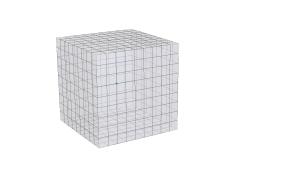
I created a cube primitive with 8 tesselations to give me a nice center set of faces to work with on each side.
Step 2 – Make holes
I removed the 9 middle faces on each side, leaving the top and bottom solid.
Step 3 – Bridge two holes
I selected the edges around two opposing faces (click on one edge of each hole and use the Loop selection to select the hole). Then in Vertex Modeling, I chose Bridge and accepted the results.
Step 4 – Bridge the other holes
Then I repeated the process to bridge the other two holes. This creates the structure, but as you can see, the holes don’t go all the way through. Each bridge is blocking the view through the other.
Step 5 – Tesselate the intersection
I hid the top of the cube (created a material zone with the top faces and hid that zone) so you can see inside the cube. I used Tesselate by Slice to slice each bridge as close to the other bridge as I could.
Step 6 – Remove the intersecting faces
Back inside the holes, I selected the new faces that were blocking my view through each hole and removed them.
Now you can see through, but if you look closely inside the hole there is a slight cap between the edges of each hole.
Step 7 – Weld the edges together
I admit to forgetting about the tools Hexagon offers at first. I started by manually going through and welding the vertices in each edge together. That was painful. Then I remembered the Average Weld function. It’s perfect for this as Hexagon is smart enough to figure out that those vertices are close enough to be welded. That went a LOT faster! Like a single click and it was done. 🙂
Step 8 – Test smoothing
Just to show I wasn’t quite done yet, I set smoothing level to 2. See that mess in the middle? That’s because there are still some faces from each hole that are overlapping there messing up the smoothing algorithm.
Step 9 – Remove the overlapping faces
I removed the faces from one of the two holes, leaving the faces from the other one in place.
Step 10 – Tesselate and weld
Once again I took the remaining faces and used Tesselate by Slice to create corresponding edges, making a grid in the center. Then I used Average Weld again to weld it all together.
Final Product
Finally, with Smoothing turned to 1 you can see all my gaps and such are gone. I could adjust the edges of the holes a bit to make them more round instead of square, add some edges around the outline of the cube to keep it from smoothing too much, but that’s just tweaking it for the effect you’re going for really.


Leave a comment